环境
最好使用Python3.8以后的版本,并且更新pip版本。
PyQt5是第三方写的Qt的Python接口,诞生比较早,所以用的人多,文档丰富。PySide2是Qt官方为Python编写的接口库,2018年发布,虽然比较晚但毕竟是亲儿子,以后还是学它吧。
安装:
此过程会自动根据不同环境安装Qt Designer到python目录/site-packages/PySide2文件夹下。
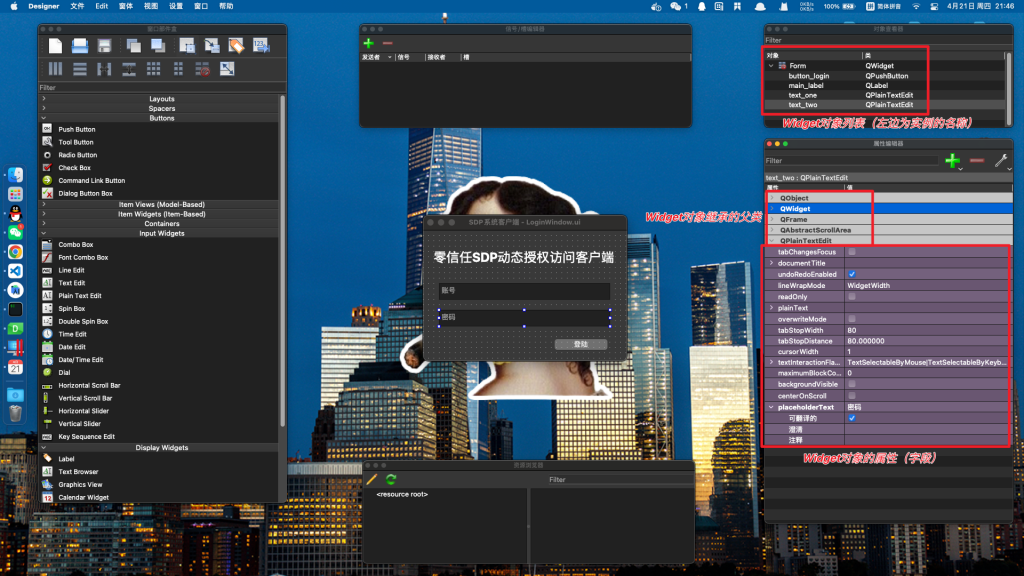
Qt Designer

保存设计好的ui文件,打开查看:

其实就是一个xml标记文件,保存了对象和布局信息。
HelloWord
将Designer生成的ui文件放入项目里的ui文件夹下。写一个Demo程序:
1
2
3
4
5
6
7
8
9
10
11
12
13
14
15
16
17
18
19
20
21
22
23
24
25
26
27
28
29
30
31
32
33
34
|
from PySide2.QtCore import QFile
from PySide2.QtUiTools import QUiLoader
from PySide2.QtWidgets import QApplication, QMessageBox
class MainWindow:
def __init__(self):
qfile = QFile("ui/main.ui")
qfile.open(QFile.ReadOnly)
qfile.close()
self.ui = QUiLoader().load(qfile)
self.ui.edit_button.clicked.connect(self.button_handler)
self.ui.show()
def button_handler(self):
print("Button pressed")
QMessageBox().about(self.ui, "Button Pressed", "输入文本:" + (self.ui.text_edit.toPlainText() if self.ui.text_edit.toPlainText() else "空"))
app = QApplication([])
w = MainWindow()
app.exec_()
|
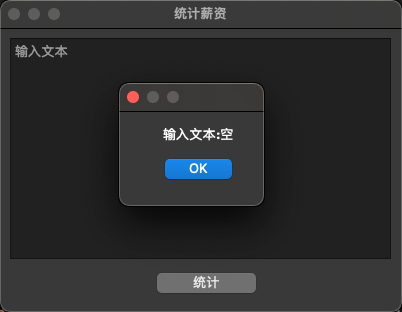
点击按钮后效果如图所示:


